Zodiac Baracuda G3 repairs


This is a quick write up on replacing a Zodiac Baracuda G3 automatic
pool cleaner “Finned Disc” (The large blue mat, part number W70329 ) and Diaphragm Cassette (Part number W69698 ) written by www.WCPandS.com. Using
this guide means that you have already troubleshooted and pinpointed the
problem of your G3 cleaner to be either a bad disc or a bad diaphragm.
Starting:
Begin by turning off the main pump to ensure that the pump cannot
turn on while the cleaner is out of the water either by turning of the breaker
at the equipment or placing the system into “Service” mode.
Remove the G3 cleaner from the pool and place it on the deck. Remove
the hose from the cleaner.
Replacing the Finned disc
(replacing the G3 blue mat):

If the disc has torn or become soft, it should be replaced since the G3
can pull the damaged disc into the diaphragm and stop the cleaner from moving.
Begin by removing the old disc by pulling it off, starting with one
side and then going around to pull off the entire disc.

The trick to replacing the disc is not to tear the new disc.


Note: The warmer the disc the easier it will stretch. If you are
having trouble stretching the disc you can soak it in warm water for a few
minutes then try to attach the disc.
The new disc needs to be pulled on; start with the flat side and get it
entirely on.

Pull the two sides on.

For the last section, you can use a flat head screwdriver to pry the
remaining section on.

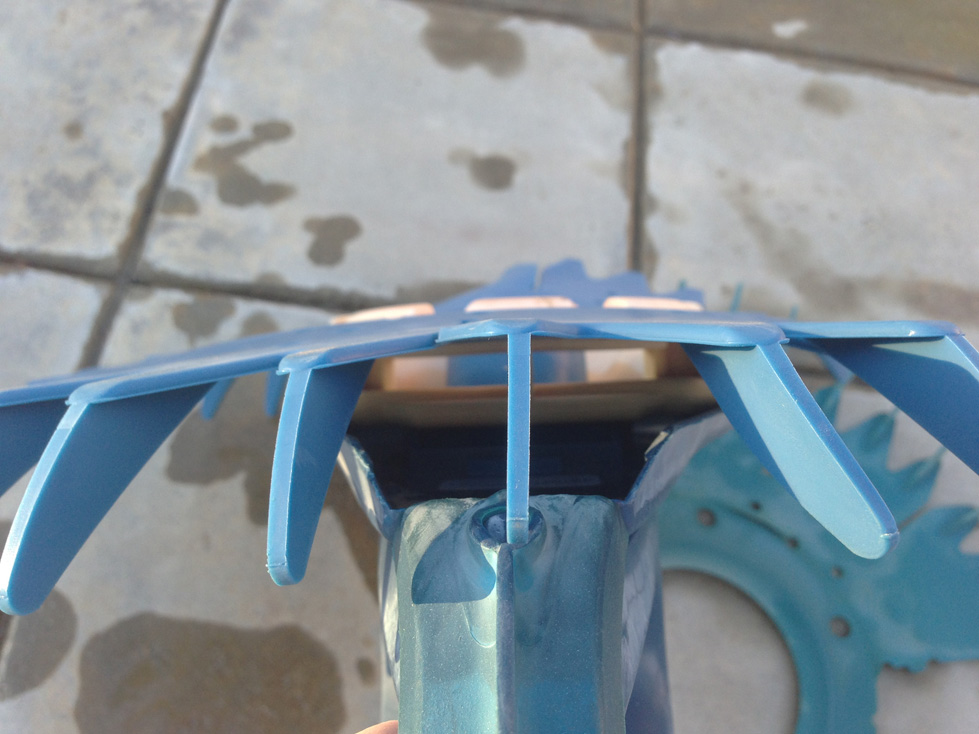
Notice that the disc should sit in between the small gap in the
footpad. You should be able to rotate the disc 360 degrees if it is installed
correctly.


Replacing the Diaphragm
Cassette:

Usually, the cleaner will stop moving once the diaphragm has a tare. To
check the diaphragm or replace it, the cleaner will need to be opened.
Remove the entire center assembly (called the Compete Cassette
Assembly) by unscrewing the yellow nut from the main body.


The center assembly will pull straight out once the nut is released.

Unscrew the top half of the center assembly from the bottom half.


With the bottom half section, push the “Threaded Inner Extension Pipe”
down and out of the bottom section.


At this step, you can view the diaphragm for damage. Look for any tares in the
rubber and if any are found, replace the diaphragm.
If you are replacing the diaphragm, continue reading.
Pull the diaphragm off of the Threaded Inner Extension Pipe.

Remove the “Retaining Ring” form the diaphragm. You can bend the
diaphragm to remove this ring.

Using the new diaphragm, you will repeat the above in reverse order
(follow the pictures above backwards) to reassemble the G3 cleaner.
1) Attach the Retaining ring.
2) Attach the diaphragm to the Threaded Inner Extension Pipe.
3) Push the Threaded Inner Extension Pipe in through the bottom end of
the bottom half assembly.
4) Screw the top half to the bottom half assembly.
5) Screw the yellow nut on the complete assembly back into the main
body of the cleaner.
6) Reattach the cleaner hose, place the
cleaner back into the pool, and turn the pump back on.
Is your pool contractors will convert my pool area into inviting atmosphere?? Are you also providing a variety of decking solution such as paving, stamped concrete and more ?? Keep on sharing!
ReplyDeletePool Equipment Repair