Sunday, March 9, 2014

Replacing Hayward H-Series Front Panel

This will cover replacing a Hayward H-Series front control bezel assembly (Manufacturer part number IDXL2BKP1930).

Note: This will not be a how to guide; instead it is a description of how we did this specific job. If you need to do any repairs on a swimming pool heater, always follow the instructions provided by the manufacturer.

Some heaters (Pentair, Raypak, and Jandy) have plastic UV shields that protect keypads and system LEDs from the elements; heaters that don’t (like the Hayward below) can suffer from weather damage, as shown in the pictures.


This H-Series heater in this article had a control panel that was so badly damaged the buttons stopped responding to touch.

The new panel, as seen below, has a circuit board connector cable connected to it. Once the cable is plugged in, any of the buttons pressed sends a signal to the circuit board. The lights and LED screen are part of the circuit board - not the replacement panel.


There are four Philips-head screws holding the old panel to the heater, so all four must be removed.

The panel can now be pulled forward away from the heater. A flathead screw driver can be used to pry the two apart.


The connecting ribbon must be pulled from the old front panel and out of the circuit board.

There are two Philips-head screws holding the circuit board to the old panel. These must be removed to separate the two.

The smaller green circuit board needs to be detached from the old front panel. There are just four plastic snaps holding it together. Push one side out, and then pull that half of the small board up and away to release it.

Here you can see the old panel next to the new replacement panel.

Note: The new replacement had two small pillars in the middle of each side that stopped new cover from sitting flat against the heater. I cut these off with wire cutters to make the new cover fit correctly. The newer models of H-Series heaters may have two additional screws to attach the panel to the heater.

The new panel was placed on the old circuit board, and then it was attached using the original Philips-head screws.

Now the LED screen on the small green circuit board needs to be pressed down and locked into position.

The new panel can now be pushed back into position on the front of the heater. The original four screws were then used to hold the new panel in place.

This specific H-Series heater had its LED display damaged while the circuit board was exposed to the elements. The old panel was so damaged that water could get into the heater and on the electronics. While the heater would work (heated water) in its current condition, the display is unreadable.

Supplemental pictures of changing an automatic water fill.

Supplemental pictures of changing an automatic water fill.
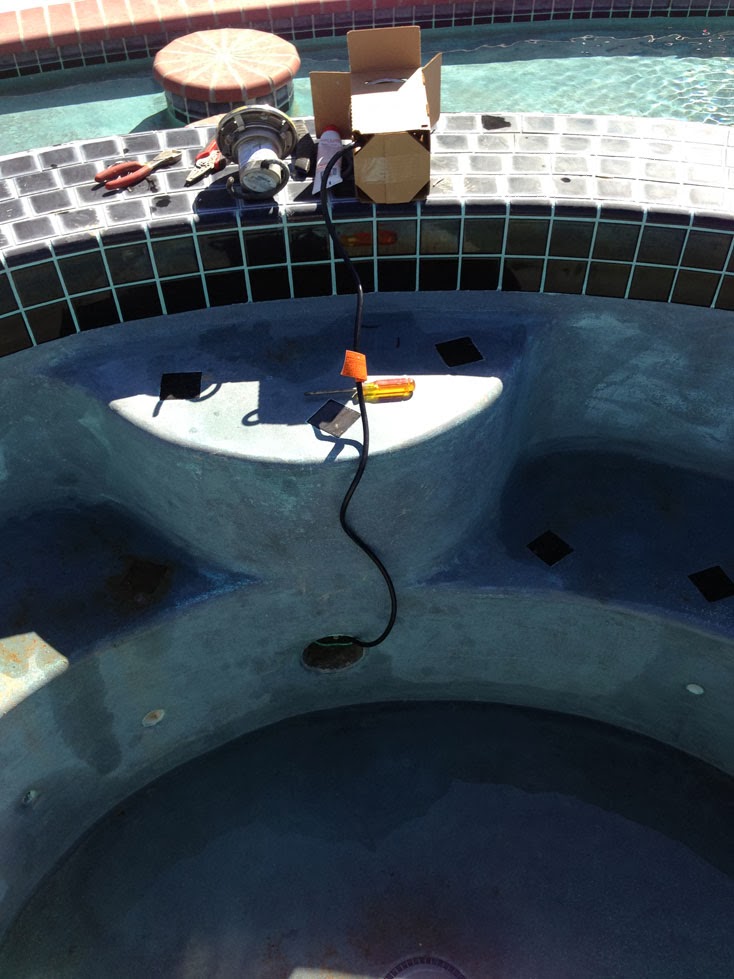
Here are a few additional pictures of a swimming pool automatic water fill being replaced. This is meant to be used for additional reference.
The original post with more detailed pictures is found here

A short video of the original water fill that is broke (it never stops adding water).

The original float still installed.

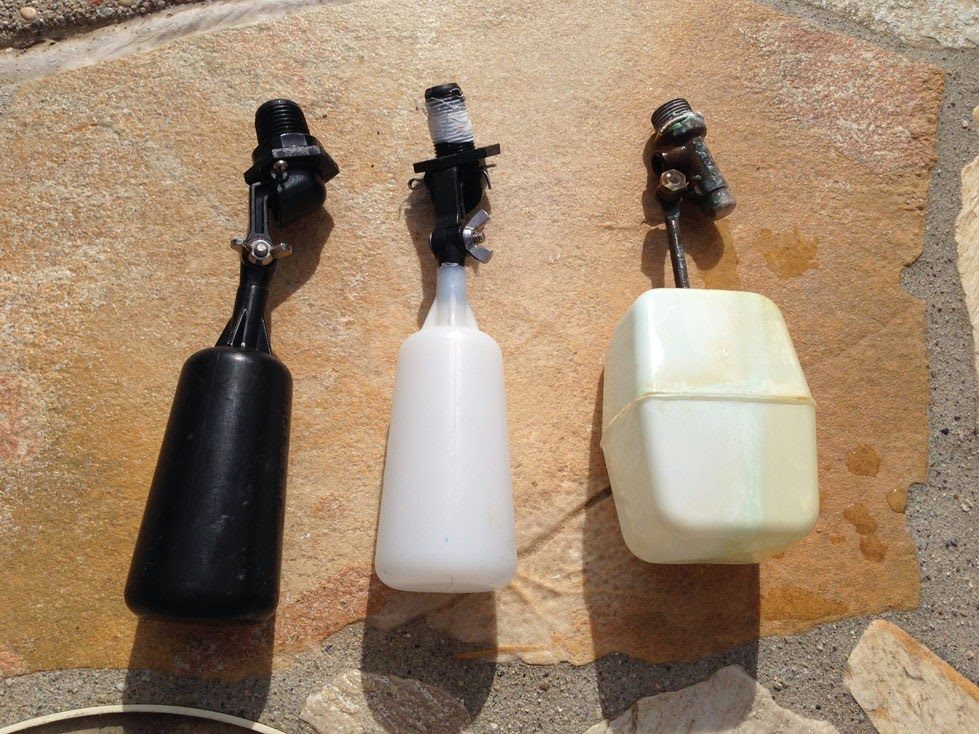
Two new auto fill floats, one of each size (3/8” and ½” ) next to the original float.

New float installed.


Tuesday, January 14, 2014

Spa Light Halogen Addendum

This is meant as an addendum to the previous Pool/Spa light bulb replacement write up. If your light does not look like the bulb in the example this article might apply to you.

Spa lights come in a few different forms: narrow flood, medium base halogen, a standard flood light or a thinner halogen JD bulb.

With any of the bulb types listed, the lens gasket is the same.

The installation difference is with the thinner halogen JD bulbs. Inside the light, after the lens and the lens gasket are removed, is a reflector.

At this point, the reflector can be pulled out.

Before a halogen bulb can be unscrewed, there is a metal brace that needs to be released by using one hand pull the two sides of the brace holding the bulb together.

While still holding the brace open, unscrew the halogen bulb.

When installing the new bulb, the brace will need to be held open. When finished, release the brace and it will hold the bulb in place.

Set the reflector back in the housing around the newly placed bulb.

Place the new lens gasket onto the old lens. The remaining steps are the same in the original write up found here
For reference the remaining photos of this specific job are below.


Friday, January 10, 2014

Swimming Pool Skimmer Equalizer/Float Assembly

Swimming Pool Skimmer Equalizer/Float Assembly
This article will explain what a Swimming Pool Skimmer Equalizer/Float Assembly is, how it works and what happens when one is missing.

Inside of swimming pool skimmers are either one or two open ports at the bottom.


Most modern pools have two with one connected to the system pump and the other utilized as an equalizer port. The equalizer port is connected to the main drain (at the bottom of the pool) or an open port on the side of the pool a few feet down from the skimmer opening. There is usually a float assembly unit covering both ports in the skimmer.

A float assembly is a saucer shaped device with a float inside and an adjusting flap on the bottom.

The flap is normally pushed to the side, leaving the center opening uncovered.

When everything is working properly and the water level of the swimming pool is at the correct level, water flows in from the upper opening down into the skimmer, through the float assembly and down into the back open port to the pool pump. See figure 1
(Figure 1)

If the water level drops below the skimmer opening, the float inside the float assembly drops which connects the equalizer and the pump ports. Water is pulled from the equalizer under the now closed float assembly and down into the pump port. See figure 2.
This ensures that the pool pump still circulates water, keeping the water filtering while cooling the pump motor (since it is water cooled).
(Figure 2)

The back port is used when connecting a vacuum hose to manually vacuum the pool. Not knowing what a float assembly does, it is common for swimming pool owners to remove these from skimmers and not replace them. Once removed, the system works as shown in figure 1. However, if the water level of the pool drops below the skimmer without a float assembly, the pump will pull air into the lines causing the system to lose prime (internal pressure pulling water from the pool and through the equipment). Most pool pumps cannot detect the loss of water flow and will continue to run dry. Since the pumps are water cooled, they can overheat, thus melting the connecting pipes and eventually burning out the motor.

If a swimming pool skimmer is missing a float assembly, these are not universally compatible and the makers name is needed to find the correct unit. To find the manufacturer’s name, check the skimmer lid to see which float assembly is needed. Some of the most common manufactures are Anthony Pools, American Products, StaRite, Pentair and Hayward Pool Products.


Monday, October 14, 2013

Pentair IntelliBrite 5G Spa Light


Pentair IntelliBrite 5G by Wine Country Pools & Supplies
This is a short review and walkthrough of the installation of a Pentair IntelliBrite 5G underwater color changing LED light for spas (Part number 640233) by www.WCPandS.com.


Light information:
The IntelliBrite 5G is a multicolored light. Turning the light on and off will change the color and/or mode.
For greater control, an IntelliBrite controller (Part number 600054) can be purchased separately and installed to directly control the light modes.

The IntelliBrite Spa LED light uses just 18 watts (but lists a possible maximum of 40 watts) compared to the non-LED 60-250 watt Spa lights. The LED version costs about 3 times as much as the standard version.

The light fixtures come in both 12V and, more commonly, 120V wattage versions. Each version also has 3 available cord lengths- 50ft, 100ft, and 150ft.

The installation
This will cover the installation of our Pentair IntelliBrite 5G underwater spa light. Certain installation steps may vary. For full instructions on installing this light, see the manual that accompanies it.

Tools Used:
Wire cutters/strippers
Phillips head screwdriver
Electrical tape


The LED light will replace an existing Pentair SpaBrite light so the existing housing will fit the new LED light fixture without any modification.

Disconnect the power: First, turn off the power for all pool and spa lights at the breaker box.


Locate and open the junction box for the lights. It is usually around the pool/spa area but may be near the pool/spa equipment.

Before proceeding any further, make a note (and possibly a picture) of how all the wires in this are connected. After the installation, everything will need to be connected in the same way.

Just the spa light that will be replaced needs to be disconnected. To find the correct set of wires, disconnect all but one set and then turn back on the breakers for the lights. Now the lights are turned on to see which light has powered on.

Drain the Spa: For this specific installation, the spa sits 3 feet above the pool water line. The spa was drained in to the pool by changing a valve position and turning on the pool pump.

Remove the old light while pulling the new light through:
There is a single screw holding the old spa light in place. Remove it with a Phillips head screwdriver.


The light can now be pulled out.


The cord was cut near the end of the old light fixture.


4 inches of the black rubber casing was cut and removed from the wires.


The new wire will be attached to the end of the old wire and then pulled though the existing line, running underground from the fixture housing to the junction box.

The end of the old wire needs to be attached to the end of the new wire using the electrical tape. The connection between them needs to be strong but also thin enough to fit through the conduit pipe underground.


The new wire is stretched out. It will then be easier to guide while pushing it though the existing pipe.


It helps to have two people-one to pull the wire at the junction box and the other at the fixture housing to guide the wire though and tell the other person to stop when enough wire has been pulled though.


Note: Do not try to splice the new light fixture directly in to the old wire. This wire needs to be water and weather-proof.

The length of the wire from the light to the fixture should be long enough so the new light can be placed out of the water on the side of the spa in case it needs to be opened for maintenance.


Wire the new light:
Cut or remove the tape connecting the new and old wires at the junction box.

The new cable needs to be cut and spliced with enough length to connect the new wires to the wires going to the power box but short enough to fit under the lid of the junction box.

On the new cable, there will be 3 wires-Hot (black or red), neutral (white) and ground (green). These need to be connected exactly the way the wires from the previous light were connected.


Note: Usually, wires that are the same color will be connected but this is not always the case.

Placing the new light:

The new LED light will be placed into the old fixture housing. Wrap the cord around the light fixture and push it into the housing, making a note of the top of the fixture (with the screw hole).


The spa can now be refilled with water to its original level.


Final thoughts
Installation was easy since the IntelliBrite 5g Spa light fit in to the older Pentair SpaBrite fixture housing.  
At night, the LED lights are bright but not as bright as the incandescent version it replaced.

I couldn’t find any information on how long these lights last, but LED lights generally last longer than incandescent ones. However, Pentair makes no claims in the documentation of length of life on these. At a cost of 3 times as much for the LED version, it doesn’t seem like a good way to go to save money over the lifetime of the light.

The multicolored lights are definitely a great way to add some character to your spa so if price is not an issue, try the IntelliBrite 5G Spa light.