Saturday, August 11, 2012

The pool cleaner replacing skirts


The pool cleaner the replacing skirts:

Replacing front skirt:
The front skirt is made up of two parts available in two kits. written by www.WCPandS.com. For the standard white pool cleaner, the “Brackets for skirt” part number is 896584000-419 for the top half and “Skirts with rollers” part number is 896584000-259 for the bottom.

Start by connecting each of the two halves together before attaching to the pool cleaner. This will be done four times.

The bottom section of the top half (see picture below) will be pushed into the top section of the bottom half 
This is a tight fit and requires a strong hand to snap the two together.


Each combined piece will now be inserted one at a time as shown.
For the first two, one side is pushed under an open slot and slid in place.

Push the first all the way to one end
 

For the third, it will need to be inserted on the opposite side of the two already placed in.


One side of the fourth and final piece will be inserted as the other 3 were, but now the opposite side will need to be forcibly snapped in.


Push the last side down and snap it in place.


Replacing the back skirt:
The back skirt is made up of two parts. For the white pool cleaner “Skirt Kit B” the part number is 896584000-105 and for “Brackets for Skirt” thepart number is 896584000-419. Note that two of the “Brackets for skirt” are extra and will not be used.


The two largest pieces will be at both ends of the skirt line.
Only 2 of the 4 “Brackets for skirt” will be used.

Start by attaching one skirt bracket with one bottom skirt.

These are snapped together by hand. Do this twice for the two middle skirt pieces.


Now you have the 4 sections that together make up the entire back skirt.

Slide one section of the single long pieces into the back skirt line.


Now slide the other side down and in all the way to one side.

Take one of the middle two part pieces and insert one side. Then, slide that piece all the way over to the already inserted piece.
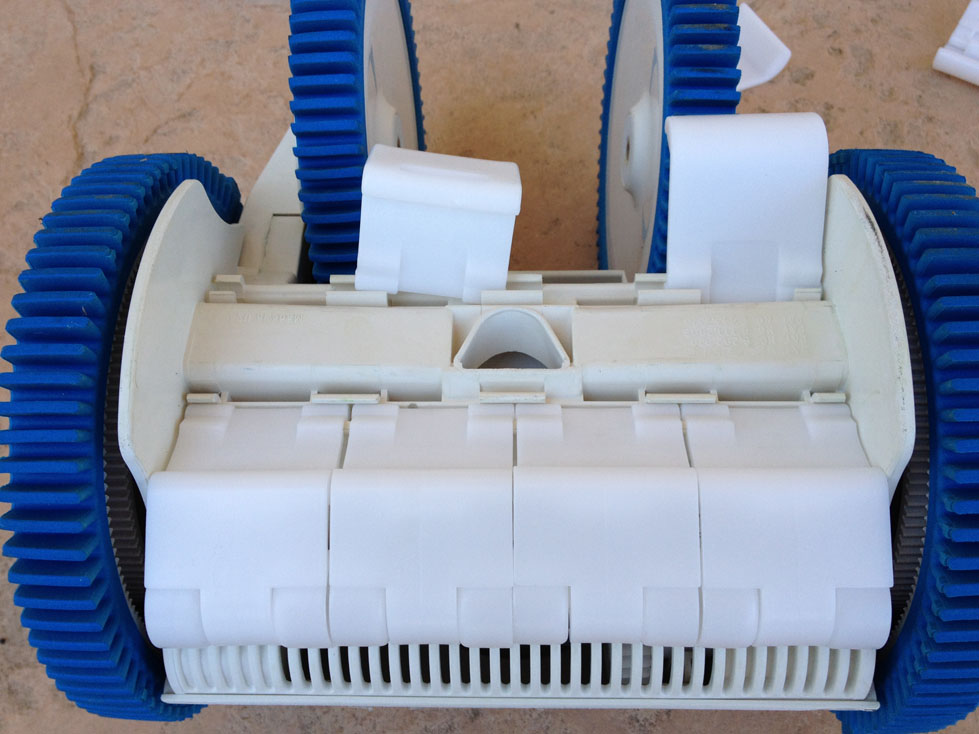


With the other single long piece, insert one side (like in picture) and then slide over and in.


For final middle section piece, insert just one side by sliding it in.
The remaining side needs to be pushed down and snapped in by hand.

Once inserted, each piece should move back and forth freely.
See the pictures to make sure that your skirt parts have the same angle as the parts in the pictures.

With the two extra parts.


Thursday, August 2, 2012

How to fix a swimming pool automatic water fill


How to fix a swimming pool automatic water fill
This guide will cover how to find and identify your built-in swimming pool’s automatic water fill. written by www.WCPandS.com. Also included is adjusting them to set the water level and how to replace one since these occasionally break and need replacement or repairs.

How to find your automatic water fill water shutoff valve
If the automatic water fill breaks, it can run continually and overfill the pool (and then flood the yard) so it will need to be shut off.  To do any work on the water fill, it will first need to be turned off. There is no industry standard on where to put the shut off valve or what it will even look like. It can be near the pool equipment, at the house (where the backyard hose connects), or somewhere else in the backyard (i.e. in bushes or grass).
Below are a few examples of automatic water fill shutoff valves. (Click on any image to see a larger version)


Finding your automatic water fill device
These are generally found on the pool deck near the deck edge with a skimmer lid top.
It may be held in place with screws that will need to be first removed to open the lid.

Three types of built-in automatic water fills
Pentair Autofill (the leaver):

The most common type, this is a float connected to an adjustable leaver. These leavers are screwed into the side of the water fill cubby. A nice aspect of this model is that there is a large variety of easy to find  third party replacement leavers and floats available for this unit.

To adjust, loosen the wing-nut. This allows the float to be raised or lowered. The higher the float, the higher the water level of the pool will be; the lower the float, the lower the water level of the pool.

The Poolmiser:
(From the Poolmiser website)

The second most common, this one has a moveable float that sits around a center pipe. These are screwed to the bottom of the water fill cubby. Because of the limited space, the top may need to be removed to turn the center shaft without rotating the float when replacing one of these. See the included instructions for more information on installing a replacement Poolmiser.
To adjust, turn the top screw left to raise the float (raise the water level) and turn right to lower the float (lower the water level).


Paramount Paralevel:
(From the Paramount website)

Unfortunately, I have never worked with or seen one of these installed so I am unable to provide comments.

Replacing the automatic water fill (Pentair Autofill)


Note: This side connecting water fill needs to be placed with the water faucet side down.

Unscrew the existing broken leaver at the base near the wall in a counter clockwise direction with either a crescent wrench or pliers.

On the new replacement leaver, use a thread tape or thread paste on the exposed thread of the water fill.

Screw in the entire piece clockwise hand tight. Using a crescent wrench or pliers, align this water fill so the faucet side is down.

The water fill level can also now be set. There is an adjusting wingnut on the side of the leaver that can be loosened to allow the float to be moved up and down. The lower the float, the lower the water level of the pool.

Once the level is set, turn the automatic water fill shutoff valve back on.

Replace the top of the water fill cover.

To see additional pictures see a small post here

Wednesday, August 1, 2012