The Pool Cleaner Turning Problems:
This is a short guide on how to troubleshoot a Poolvergnuegen Pool
Cleaner that doesn’t turn or is turning in circles. This could be caused by a stuck wheel or a single wheel that doesnt move.
Click on any image to see a larger version.
Click on any image to see a larger version.
Before starting, check that the pool sweep is getting enough suction.
Pull the unit up to the side of the pool.
While the system is running, unplug the hose from the pool cleaner and using
your hand check that water is being pulled into the hose.
If there is suction from the hose, plug the hose back into the pool
cleaner. The wheels should start moving.
If one wheel moves freely alone see below on replacing a wheel hub.
If one or more wheels do not move, while the system is turned off,
remove the pool cleaner from the water and remove the connecting hose.

The wheels should not move independently of the other wheel(s). Each
wheel is attached to at least one gear that is in some way connected to the
other wheel(s).
If one wheel is does not move, check for obstructions in the wheels from the outside.


If none is found, you will need
to open the unit in order to look for an obstruction.


If you need to access the center main turbine the middle section with
the hose connecter can now be pulled straight up and off


If you can spin one wheel and the other does not move, then the plastic
wheel hub or drive gear on that specific wheel has worn down and will need to
be replaced.
The drive gear for either side of the unit can only be changed by
opening the pool cleaner top and removing the associated wheel.


This is was not necessary for this specific unit full instructions are
not provided here.
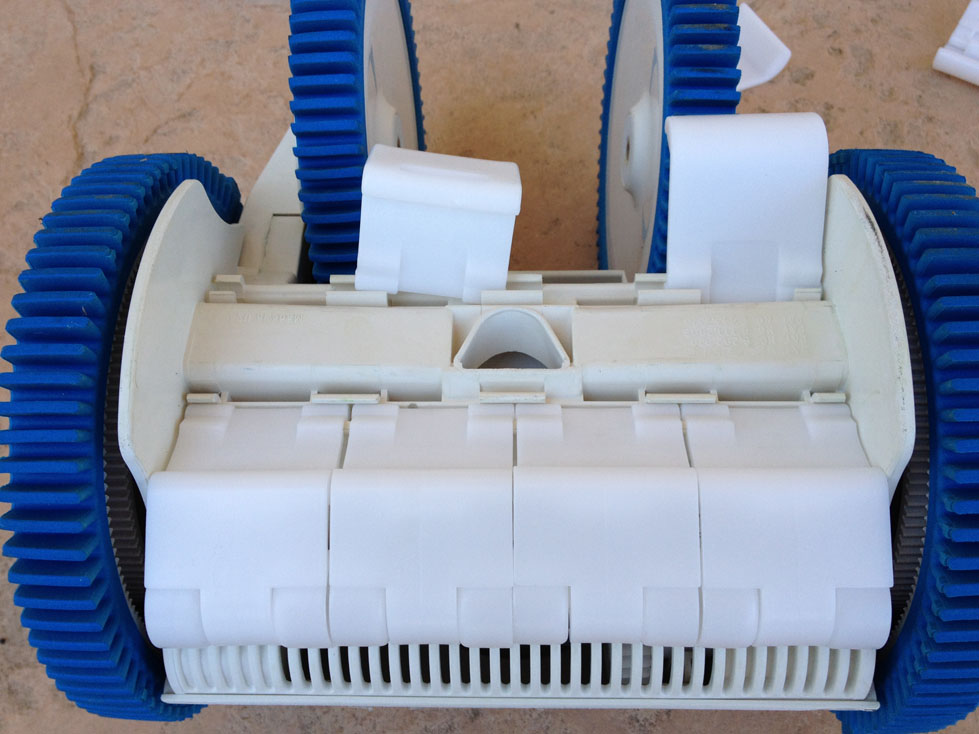
Replacing a pool cleaner wheel
(hub):
To begin, you need a replacement wheel hub. For a white pool cleaner,
the part number is 896584000-051. In this example, we will be working on a
black limited edition unit. The part number of the black wheel hub is
896584000-532.


Remove the wheel that needs to be replaced
with an allen wrench.


Completely remove the center allen screw.
The
wheel can now be pulled straight out away from the cleaner and off.

The rubber tire needs to be pulled off. Start with one side and pull it up and over to one side.

Continue to go around the wheel, removing
the tire completely.

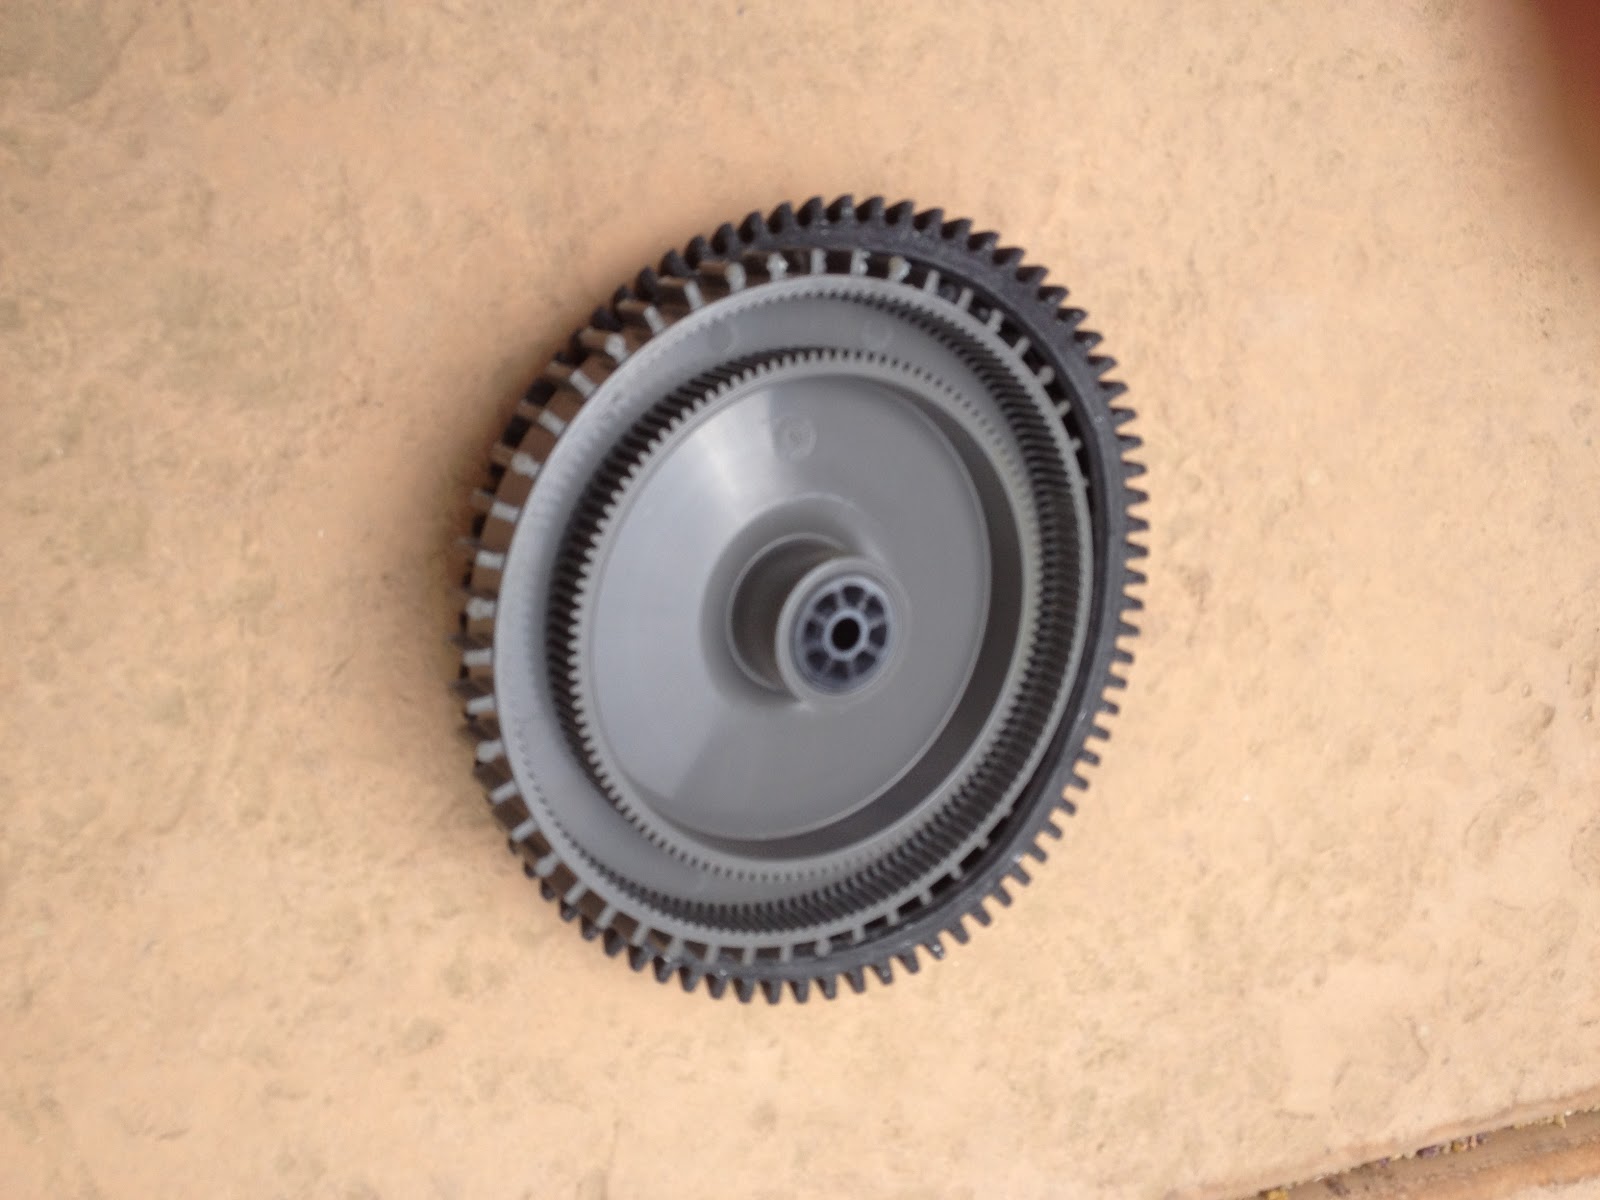
You can see in the pictures the difference
in gear teeth between the new and old wheel hubs. (click on the pictures to see a larger version)


The old tire will need to be pulled onto the
new wheel hub. Start on one side and work your way around, pulling the tire up
and over in place.
To attach the new hub to the pool cleaner,
we only need to do the opposite of how we took it off.
Hold the wheel up to the pool cleaners side and
insert the screw though the hub in to the side of the pool cleaner.
Tighten with you allen wrench, this only
needs to be snug and the end flush with the side of the hub, do not force this
screw in too far.
Test that the wheel no longer moves independently.
Place the pool cleaner back into the pool,
connect hose and restart the system.


